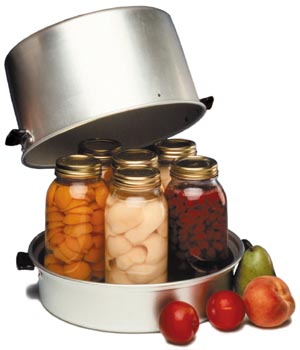
Many people enjoy spending a cool fall day (or two) doing some canning. The windows can be open, so even if your kitchen escapades heat up the house you have a lovely breeze coming through to cool you off.
Hopefully the overview below is informative and helpful to you in either getting started, or in giving canning another go if you’ve tried it before!
What do you need?
- A canner (many people use a big pot and the boiling water method, though it is often recommended to get a pressure canner)
- A canning rack (this is what you sit your jars on in the pot)
- One or more funnels (for pouring your concoctions into the jars)
- Jar lifter (very handy in order to get those jars in and out of the hot HOT water)
- A jar wrench (to loosen the lids after canning — so you can eat your delicious concoctions!)
- An assortment of jars, tops, and lids
Then what do I do?
Although the cooking times and packing instructions will vary depending on what you are making, there are some basic guidelines you’ll need to follow, no matter what you’re preserving.

2. Hot Stuff. What’s going into the jar must be HOT. The jars will be hot (you just sterilized them, good job!) and in most recipes the food itself should be bubbling hot on the stove when you go to put it into the jars. If the jars are being packed cold (like with pickles) the pickling liquid you’re using should be boiling hot.
3. Acidity. One of the keys to successful canning (read: safe to eat, no bacteria!) is to follow the recipe/directions closely. In addition to the temperature of both the ingredients and the hardware, the amount of acid in the recipe is key. It is VERY important to follow each recipe and use the exact amount of the exact ingredients and cook at the exact temperature for the exact length of time. Got it? EXACTLY! 🙂
4. Boiling Times. Your goal is to ensure that NO bacteria survive the canning process. Jars must seal tightly, there needs to be enough space remaining in the jar after you’ve filled it to ensure that the food has room to expand in the heat without pressing on the jar tops and lids (this can break the seal). Your jars need to be properly sealed and boiled for the amount of time required (and in the method described in your recipe) in order to ensure they’ll be safe to consume when you are done.

6. “Pop”. Did you hear a popping noise as your jars cool and seal? If the tops do not curve in nicely, the seal hasn’t work, or hasn’t held. This becomes your ‘tester’ jar — keep it in the fridge and use it right away.
7. Storage. Store your delicious finished product in a cool, dry, dark place. Canned goods make lovely hostess gifts, tie them up with a little ribbon and pop on a custom label (easy to make with labels you can get online or at craft or office supply stores).
8. Be Sure! If anything about your jar seems off, if the lid is bumped out, slightly askew or if you notice mold, bubbles, cloudiness, bad smells, or oddly discoloured food when you open a jar, don’t even think about trying it! Throw away the lids and seals, and dump out the contents. You can reuse the jar without concern.
So those are some starter points –for more information, Eat Right Ontario has a great FAQ page about canning that will answer any questions a new canner might have. Check it out for all the basics and tips to get you started. You might also want to visit About.com’s Canning Site.

Good luck with your preserving — if you have a favourite recipe to share with us please post it as a comment or email me and I’d be happy to share it with everyone on the blog!
Cheers,
Heather
